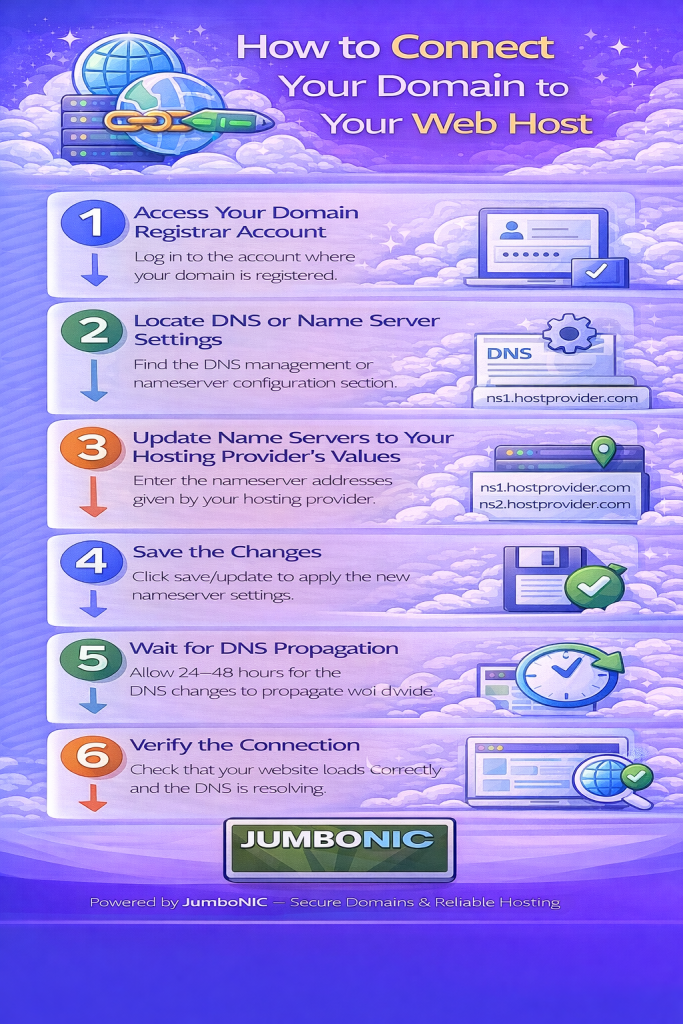
🔗 Step-by-Step: How to Connect Your Domain to Your Web Host
(Simple Guide for Beginners)
You’ve purchased your domain name and your web hosting — great!
Now there’s just one thing left to do:
Connect them together so your website appears when someone visits your domain.
This process is called DNS linking — and don’t worry, we’ll keep it very simple.
🧠 First, Understand the Goal
Your domain is the address.
Your hosting is the home where your website files live.
To connect them, we need to tell the domain where the hosting is located.
We do this by updating Nameservers.
🟦 Step 1: Log In to Your JumboNIC Account
Go to jumboNIC website
Log in to your client dashboard
Click on Domains
Select the domain you want to connect
This opens your domain management page.
🟦 Step 2: Find the Nameserver Settings
In your domain management panel, look for:
DNS Settings
orNameservers
You will see something like this:
ns1.examplehost.com
ns2.examplehost.com
These are the current nameservers — we will replace them with your hosting provider’s nameservers.
🟩 Step 3: Get Your Web Host’s Nameservers
Your hosting provider gives you two or more nameservers.
Common examples:
| Provider | Nameservers Example |
|---|---|
| JumboNIC Hosting | ns1.jumbonic.com / ns2.jumbonic.com |
| Other Hosting Provider | Provided in email or dashboard |
ns1.jumbonic.com
ns2.jumbonic.com
If using another hosting provider, check your hosting welcome email or dashboard for their nameservers.
🟦 Step 4: Replace the Nameservers in JumboNIC
In your JumboNIC Nameserver Settings:
Select Use Custom Nameservers
Enter the nameservers provided by your host
Click Save or Update
⏳ Step 5: Wait for DNS Propagation
This part requires patience.
It usually takes:
30 minutes to a few hours
But can take up to:24–48 hours (in rare cases)
During this time:
✅ Some people may see your site
❌ Some may not yet
This is normal — the change is being synced globally.
✅ How to Verify It’s Working
After a few hours, try typing your domain into your browser.
You should now see:
Your website
orYour hosting provider’s default page (if your website isn’t uploaded yet)
If you see either — the domain is successfully connected 🎉
💡 If You’re Hosting with JumboNIC: Setup Is Even Easier
When both your domain and hosting are with JumboNIC:
Nameservers are often set automatically
No manual DNS setup needed
One support team handles both domain + hosting
This makes setup faster and beginner-friendly.
🧯 Troubleshooting Tips
| Problem | Solution |
|---|---|
| Seeing old website or error page | Clear browser cache or try in incognito |
| DNS not updating after 24 hours | Re-check nameserver spelling |
| Still not working | Contact JumboNIC support for quick help |
JumboNIC’s support team can do the linking for you if needed — just tell them your domain + hosting plan.
⭐ Quick Summary
| Step | Action |
|---|---|
| 1 | Log in to JumboNIC Dashboard |
| 2 | Open Domain → Nameserver Settings |
| 3 | Enter your hosting provider’s Nameservers |
| 4 | Save & wait for DNS Propagation |
| 5 | Your domain will now point to your website 🎉 |