🔄 How to Move an Existing Website to Your New Hosting
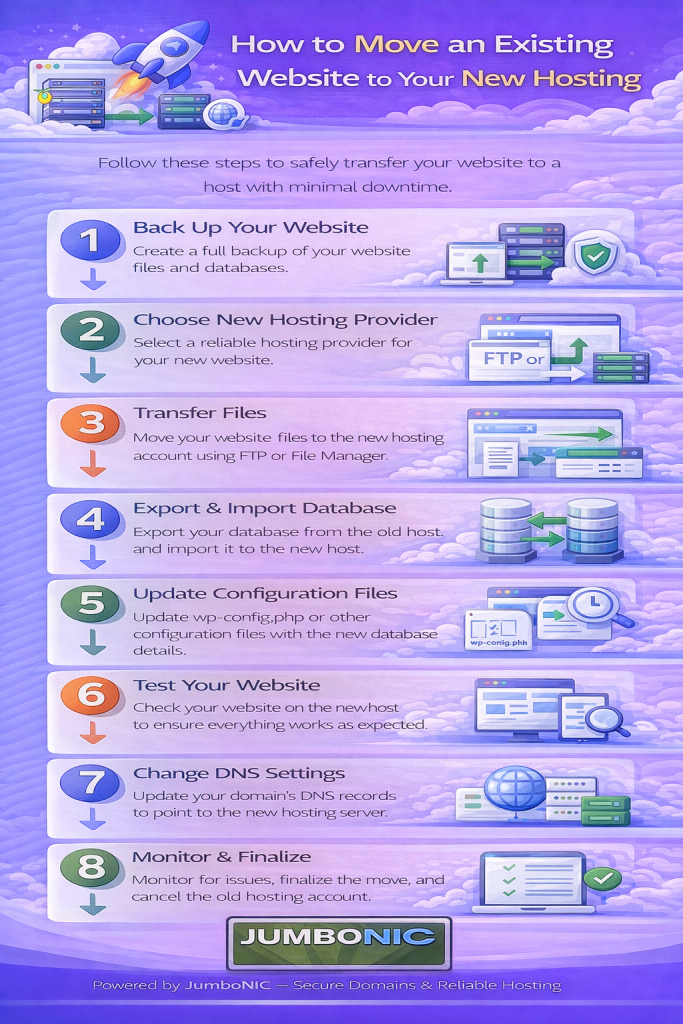
Switching to a new hosting provider can sound complicated — but it doesn’t have to be. Whether you’re moving your website to improve speed, security, SEO, or support, the migration process is straightforward when you follow the right steps.
This guide will show you how to transfer your files, database, and domain settings so your website runs smoothly on your new hosting — especially if you’re moving to JumboNIC.
🧠 Before You Begin
Make sure you have:
| Item | Where to Get It |
|---|---|
| Access to your old hosting account | Current web host |
| Access to your new hosting account | JumboNIC hosting panel |
| Domain login | Your domain registrar (JumboNIC or elsewhere) |
If your domain is already with JumboNIC, migration will be even easier.
🟦 Step 1: Backup Your Website Files
If your old host uses cPanel:
Log into cPanel
Open File Manager
Go to: public_html
Select all files → Click Compress
Download the .zip backup file
This contains your website’s scripts, themes, uploads, and pages.
🟩 Step 2: Export Your Database (For WordPress & PHP Websites)
In cPanel, find phpMyAdmin
Select your website’s database
Click Export
Choose Quick Export
Download the .sql file
This file holds your site content, settings, and structure.
✅ If your site is HTML-only, you do not need this step.
🟦 Step 3: Upload Your Website to JumboNIC Hosting
Log in to your JumboNIC hosting cPanel
Open File Manager
Go to: public_html
Click Upload
Select your .zip website backup
After upload → Click Extract
Your website files are now in place.
🟩 Step 4: Import Your Database into JumboNIC
Go to MySQL Databases in JumboNIC cPanel
Create a new database and database user
Assign user to database with full privileges
Open phpMyAdmin again
Select the new database
Click Import
Upload your .sql backup
✅ Database restored.
🟦 Step 5: Update Your Website Configuration
For WordPress sites:
Open:
public_html / config.php
- Update the entries:
Database Name
Database Username
Database Password
Database Host (usually: localhost)
Save changes.
Your site is now prepared to run on the new host.
🔗 Step 6: Point Your Domain to JumboNIC Hosting
If your domain is registered with JumboNIC:
Just update your DNS Nameservers in the domain panel.
If your hosting is on JumboNIC:
Use nameservers like:
ns2.jumbonic.com
If your domain is registered somewhere else:
Log in there → update to the same nameservers.
DNS Propagation Time:
⏳ 30 minutes to 24 hours (normal worldwide syncing)
✅ Step 7: Test Your Website
After DNS finishes updating:
Visit your domain in the browser
Check pages, contact forms, links, and images
Everything should now be running on JumboNIC Hosting 🎉
🛟 Need Help? JumboNIC Can Do the Migration for You.
If any step feels overwhelming:
JumboNIC offers FREE Migration Assistance with hosting packages.
You simply provide:
Your old hosting login
Your domain name
And JumboNIC support will:
Transfer files
Transfer database
Configure everything
Ensure your site runs perfectly
No downtime. No stress.
🏆 Why Move Your Website to JumboNIC?
| JumboNIC Benefit | Why It Matters |
|---|---|
| Fast servers | Improves page load speed & SEO |
| High uptime reliability | Keeps your site online consistently |
| Strong security layers | Protects your website & data |
| Easy WordPress / cPanel support | Beginner-friendly management |
| Free migration support | Hassle-free transfer process |
Switching hosting isn’t just about moving files — it’s about improving your website’s performance, trust, and growth.
🎉 Final Takeaway
Moving your website is easier than it looks, especially with a host that supports you through the process.
If you want:
Faster performance
Better SEO rankings
Stronger security
A smoother hosting experience
JumboNIC is a reliable platform to host your website and scale your online presence.