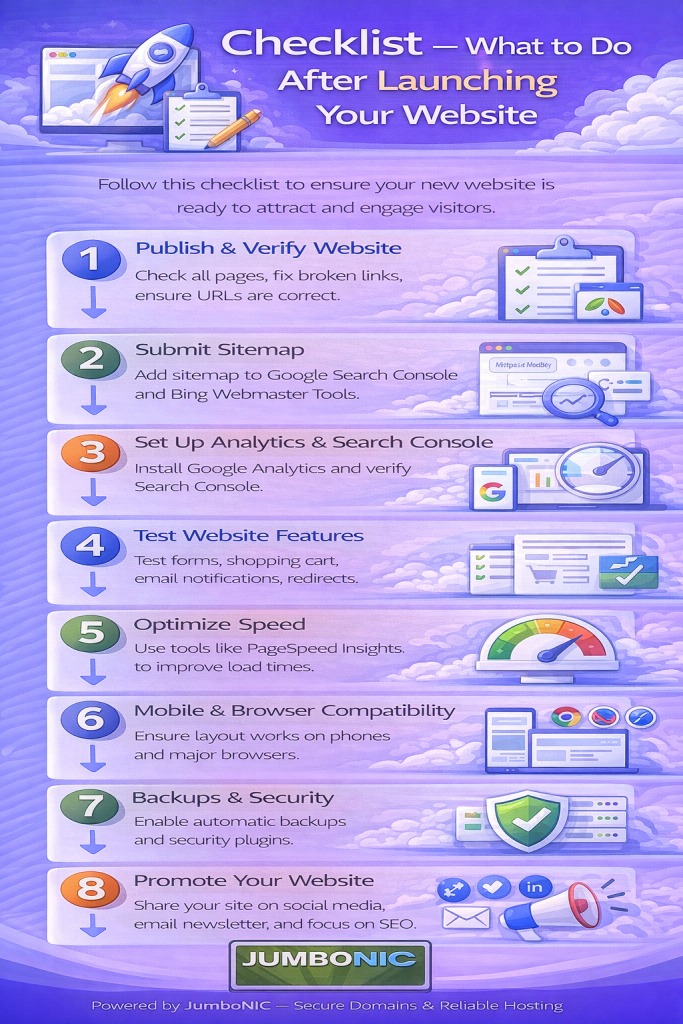
✅ Checklist: What to Do After Launching Your Website
Featuring JumboNIC
Congratulations — your website is live! 🎉
But launching is just the beginning.
To make sure your website gets traffic, ranks well on Google, and builds credibility, you need to take a few essential follow-up steps.
This checklist will guide you through everything you should do right after launching your website, even if you’re not technical.
1️⃣ Connect Your Domain to Your Hosting (If Not Done Already)
Make sure your domain is pointing to your web hosting correctly.
If your domain is with JumboNIC, this is very easy — just update your nameservers in the domain dashboard.
Using JumboNIC hosting?
You’ll use nameservers like:
ns1.jumbonic.com
ns2.jumbonic.com
✅ This ensures your website is actually visible online.
2️⃣ Install an SSL Certificate (https://)
A secure site protects your users and improves SEO.
If your site shows “Not Secure”, Google may lower your ranking.
Most JumboNIC hosting plans include FREE SSL.
Steps:
Open your hosting control panel
Find SSL/TLS
Enable AutoSSL
Your domain will now show:
https://yourwebsite.com 🔐
3️⃣ Set Up Google Analytics
Google Analytics tells you:
How many visitors you get
What pages they view
Where they come from
What devices they use
Setup:
Go to: https://analytics.google.com
Create an account
Add tracking code to your website (or use a WordPress plugin like Site Kit)
✅ Now you can track your growth
4️⃣ Submit Your Website to Google Search Console
This helps Google index your site faster.
Setup:
Add your domain
Verify using DNS (or Site Kit plugin)
Upload your sitemap (often
yourwebsite.com/sitemap.xml)
✅ This increases your chances of showing on Google search.
5️⃣ Create a Custom Business Email
Instead of:
❌ yourbusiness@gmail.com
Use:
✅ name@yourdomain.com
This looks professional and builds trust.
If you’re hosted with JumboNIC, you can create business email inside cPanel → Email Accounts.
6️⃣ Optimize Your Website for Speed
Speed = Better user experience + Better SEO.
Do these:
Compress images (use WebP)
Enable caching (WordPress: WP Fastest Cache)
Use a CDN (Cloudflare is free)
💡 Fast hosting from JumboNIC also significantly improves speed performance.
7️⃣ Add Legal & Trust Pages
These pages build credibility and are required for ads & sales:
| Page | Purpose |
|---|---|
| About Page | Introduces your brand |
| Contact Page | Lets visitors reach you |
| Privacy Policy | Required for tracking and forms |
| Terms of Service (optional) | Helpful if you sell services or products |
8️⃣ Check Mobile Responsiveness
Most visitors use phones 📱.
Your website should be:
Easy to read
Clickable
Not requiring side-scrolling
Test using:
https://search.google.com/test/mobile-friendly
If something looks wrong → adjust theme or layout.
9️⃣ Set Up Backups
You don’t want to lose your site by accident.
If using WordPress:
Install plugin UpdraftPlus or All-in-One WP Migration
Set automatic weekly backups
If using JumboNIC hosting:
Enable Automated Backups in your hosting control panel.
✅ Peace of mind secured.
🔟 Start Adding Blog Content
Content helps you:
Rank on Google
Educate your audience
Build authority
Start with:
FAQs your customers ask
“How-to” guides
Industry tips
Consistency beats perfection.
🎯 Final Takeaway
Your website is live — great!
Now make sure it:
Loads fast
Looks professional
Shows up on Google
Builds trust with visitors
And remember:
The foundation of your website success is your hosting.
That’s why many site owners choose JumboNIC for:
| Benefit | Why It Matters |
|---|---|
| Fast, optimized servers | Better loading speed & SEO |
| Free SSL support | Improved security & trust |
| Professional email hosting | Strong brand credibility |
| Helpful customer support | Guidance when you need it |
Your website deserves a reliable and scalable foundation — and JumboNIC delivers just that.