How to Set Up a Staging Site for WordPress
When you run a WordPress website, there will be times when you want to make changes — update plugins, redesign pages, test new features, or try different layouts. But doing this on your live website can be risky.
One small mistake could:
Break your layout
Cause errors
Make your site temporarily unavailable
Affect your visitors or customers
That’s why smart website owners use a Staging Site.
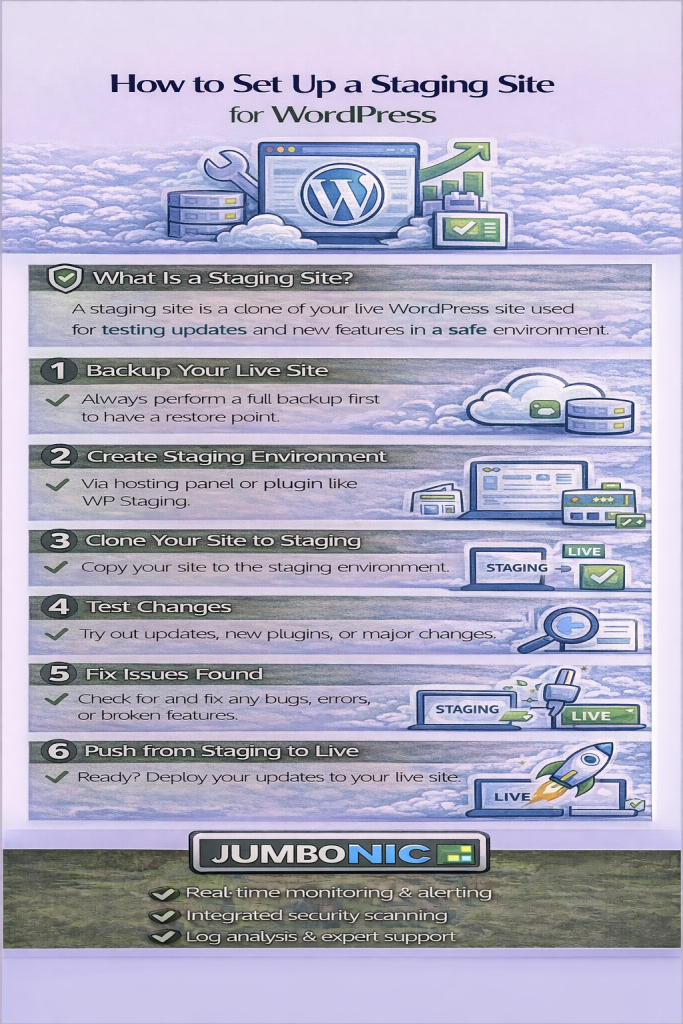
What Is a Staging Site?
A staging site is a private, clone version of your live WordPress website where you can safely test changes before publishing them live.
Think of it as your practice environment.
Benefits of Using a Staging Site:
Test updates without downtime
Fix errors before visitors see them
Try redesigns safely
Protect your SEO and user experience
How to Set Up a Staging Site (Using JumboNIC Hosting)
Most JumboNIC WordPress Hosting and cPanel Hosting plans include a 1-Click Staging Tool, making setup easy.
Step 1: Log in to Your JumboNIC Account
Go to https://www.jumbonic.com
Open your hosting service → Click Manage → Enter cPanel.
Step 2: Open WordPress Toolkit or Softaculous
Depending on your hosting plan, look for:
| Tool Name | What It Does |
|---|---|
| WordPress Toolkit | Manage WordPress installations, backups, and staging |
| Softaculous | One-click WordPress installer with staging support |
Click WordPress under either tool.
Step 3: Select Your Live Website
You’ll see your current WordPress installation listed.
Click Manage or Settings.
Look for the option labeled:
Create Staging or Clone
Step 4: Choose a Staging Domain or Subdomain
Most staging sites are created as a subdomain, for example:
staging.yourdomain.com
dev.yourdomain.com
test.yourdomain.com
Select or create one, then click Create Staging Copy.
This will:
Duplicate your database
Copy your files
Create a separate private site
Step 5: Work on Your Staging Site
You will now have a clone website where you can:
Install or update plugins
Try new themes
Edit pages or code
Test new features
Your visitors cannot see this site, only you.
Step 6: Push Changes to Live
Once you’re happy with your changes:
In WordPress Toolkit / Softaculous:
Click Push to Live.
Choose whether to:
Replace all files and database (full sync)
Or push only selected changes (safe partial sync)
Your updates will now be applied safely, without downtime.
Pro Tips for Safe WordPress Staging
| Tip | Why It Matters |
|---|---|
| Always backup before pushing to live | Prevents data loss |
| Keep staging site password-protected | Prevents Google from indexing it |
| Test forms, payments, and buttons | Ensure nothing breaks after updates |
| Delete old staging copies | Keeps hosting clean and fast |
Why JumboNIC Makes Staging Easy
| Feature | Benefit |
|---|---|
| One-Click Staging Tool | No technical complexity |
| Separate staging environment | Safe testing environment |
| Optimized WordPress hosting | Fast performance for both sites |
| Free SSL for staging | Secure testing space |
| Helpful support team | Guidance when needed |
Whether you’re running a business website, online store, or blog, having a staging site helps you update with confidence.
Final Takeaway
A staging site protects your website’s:
Design
Performance
SEO
User experience
Business reputation
If you rely on your website, staging is not optional — it’s best practice.
With JumboNIC, setting up a staging site is simple, safe, and quick — even for beginners.