How to Set Up Multiple Domains Under One Hosting Account
Featuring JumboNIC
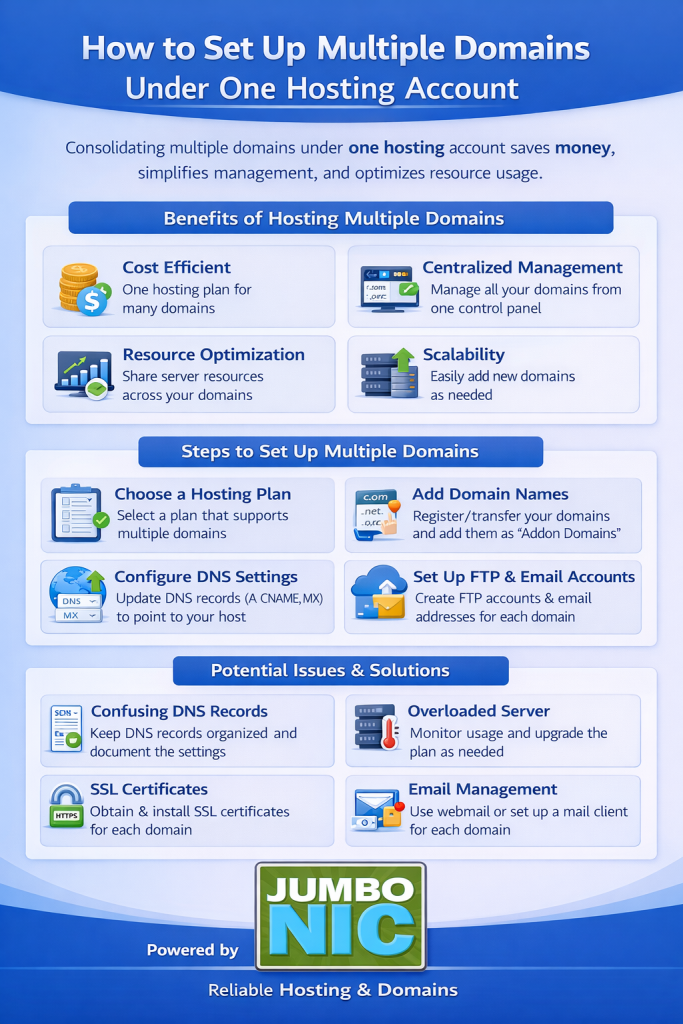
If you own more than one domain, you don’t always need to buy a new hosting plan for each website. Many hosting plans allow you to host multiple domains under one account, helping you save money and manage everything in a single dashboard.
This setup is perfect if you:
Manage multiple brands or projects
Want to run landing pages on separate domains
Own domain variations for SEO or brand protection
Run client websites under one hosting account
And with JumboNIC hosting, adding multiple domains is simple.
Understanding the Terms First
Before we continue, here are two common terms you’ll see:
| Term | Meaning |
|---|---|
| Primary Domain | The main domain attached to your hosting plan. |
| Addon Domain / Additional Domain | Extra domains you attach to your hosting account to run separate websites. |
So your hosting account can be like:
PrimaryDomain.com(main website)BrandTwo.com(addon domain)LandingOffer.net(addon domain)
Each can have its own website content.
What You Need Before Setup
Make sure you have:
✅ A hosting plan from JumboNIC
✅ Additional domains registered (with JumboNIC or any registrar)
✅ Access to your hosting Control Panel (cPanel / Plesk depending on your plan)
Step-by-Step: Add Multiple Domains in JumboNIC Hosting
Step 1: Log in to Your JumboNIC Account
Go to: https://www.jumbonic.com
Access your Hosting Dashboard.
Step 2: Open Your Hosting Control Panel
Choose the hosting service you want to manage.
Click Manage → cPanel (or hosting panel).
Step 3: Add the New Domain
In cPanel, look for:
Domains → Addon Domains
Then fill in:
New Domain Name: (example: mysecondbrand.com)
Document Root: (this will automatically generate — you can leave it as is)
Click Add Domain
This creates a separate website folder on your hosting.
Step 4: Point the Domain to Your Hosting
If the domain is registered at JumboNIC, simply:
Go to Domain Management → Nameservers
Set nameservers to:
ns1.secureserver.net
ns2.secureserver.net
If the domain is registered somewhere else:
Change nameservers there to the same values.
Wait 5 to 45 minutes for DNS propagation (sometimes up to 24 hours).
Step 5: Upload or Install Your Website
Now the domain is connected — time to build!
You can:
Upload website files in File Manager → public_html/domainname/
OR install WordPress using One-Click Installer
Each domain will run as its own separate website.
Optional (But Recommended) Setup
Enable SSL for Each Domain
In the hosting panel:
Go to SSL / Security → Let’s Encrypt SSL
Select the domain → Activate SSL
This prevents “Not Secure” warnings and improves SEO.
When Hosting Multiple Domains Makes Sense
| Situation | Is Multiple Domain Hosting Smart? | Why |
|---|---|---|
| Running 2–5 small websites | ✅ Yes | Saves money & simple to manage |
| Running multiple client websites | ✅ Yes | Faster deployment & central control |
| Running large ecommerce sites | ❌ No | Best to use separate hosting resources |
Why Use JumboNIC for Multi-Domain Hosting?
| Benefit | What It Means for You |
|---|---|
| Reliable Server Performance | Your sites load fast even when sharing resources |
| Easy Domain & Hosting Integration | No technical struggles linking domains |
| Free SSL & Security Features | Your websites stay safe and trusted |
| Scalable Plans | Upgrade only when you grow |
| Live Support Assistance | Help available when you need it |
With JumboNIC, handling multiple domains doesn’t have to be complicated — everything is made to be user-friendly, secure, and efficient.
Final Takeaway
Hosting multiple domains under one hosting account:
Saves money
Simplifies management
Works great for small to medium-size websites
Just follow:
Add the domain in your hosting panel
Point nameservers
Install your website
And you’re good to go.